Phalakasana (Plank Pose) is a seriously strong pose that doesn’t always feel so powerful. Seemingly simple, the pose is so much more than the top of a push-up on the way down to the floor. It’s a truly important foundational pose for building strength and stability, as well as awareness and proprioception. But you’ve got to hold it.
Now, you can hold it and struggle, or you can discover how to organize your body in the pose and make the most out of your time and effort spent in Phalakasana.
First and foremost, Plank Pose demands full-body activation, meaning that your entire body is involved in stabilizing the pose (not just your arms, shoulders, and chest). When it’s not—when you rely solely on the strength of your arms to hold you up—you feel heavier in the pose, which can be miserable. Learning to spread your awareness and effort throughout your whole body is imperative for a productive Plank experience.
Rather than dictating how Phalakasana is to be done and demanding your body fit into the “correct” alignment of the pose, I am inviting you to engage in process of self-study, paying attention to productive and unproductive sensations to determine the most skillful choices for you and your body. Here are five things to pay attention to as you begin to refine your Plank Pose:
Hand Placement is Personal
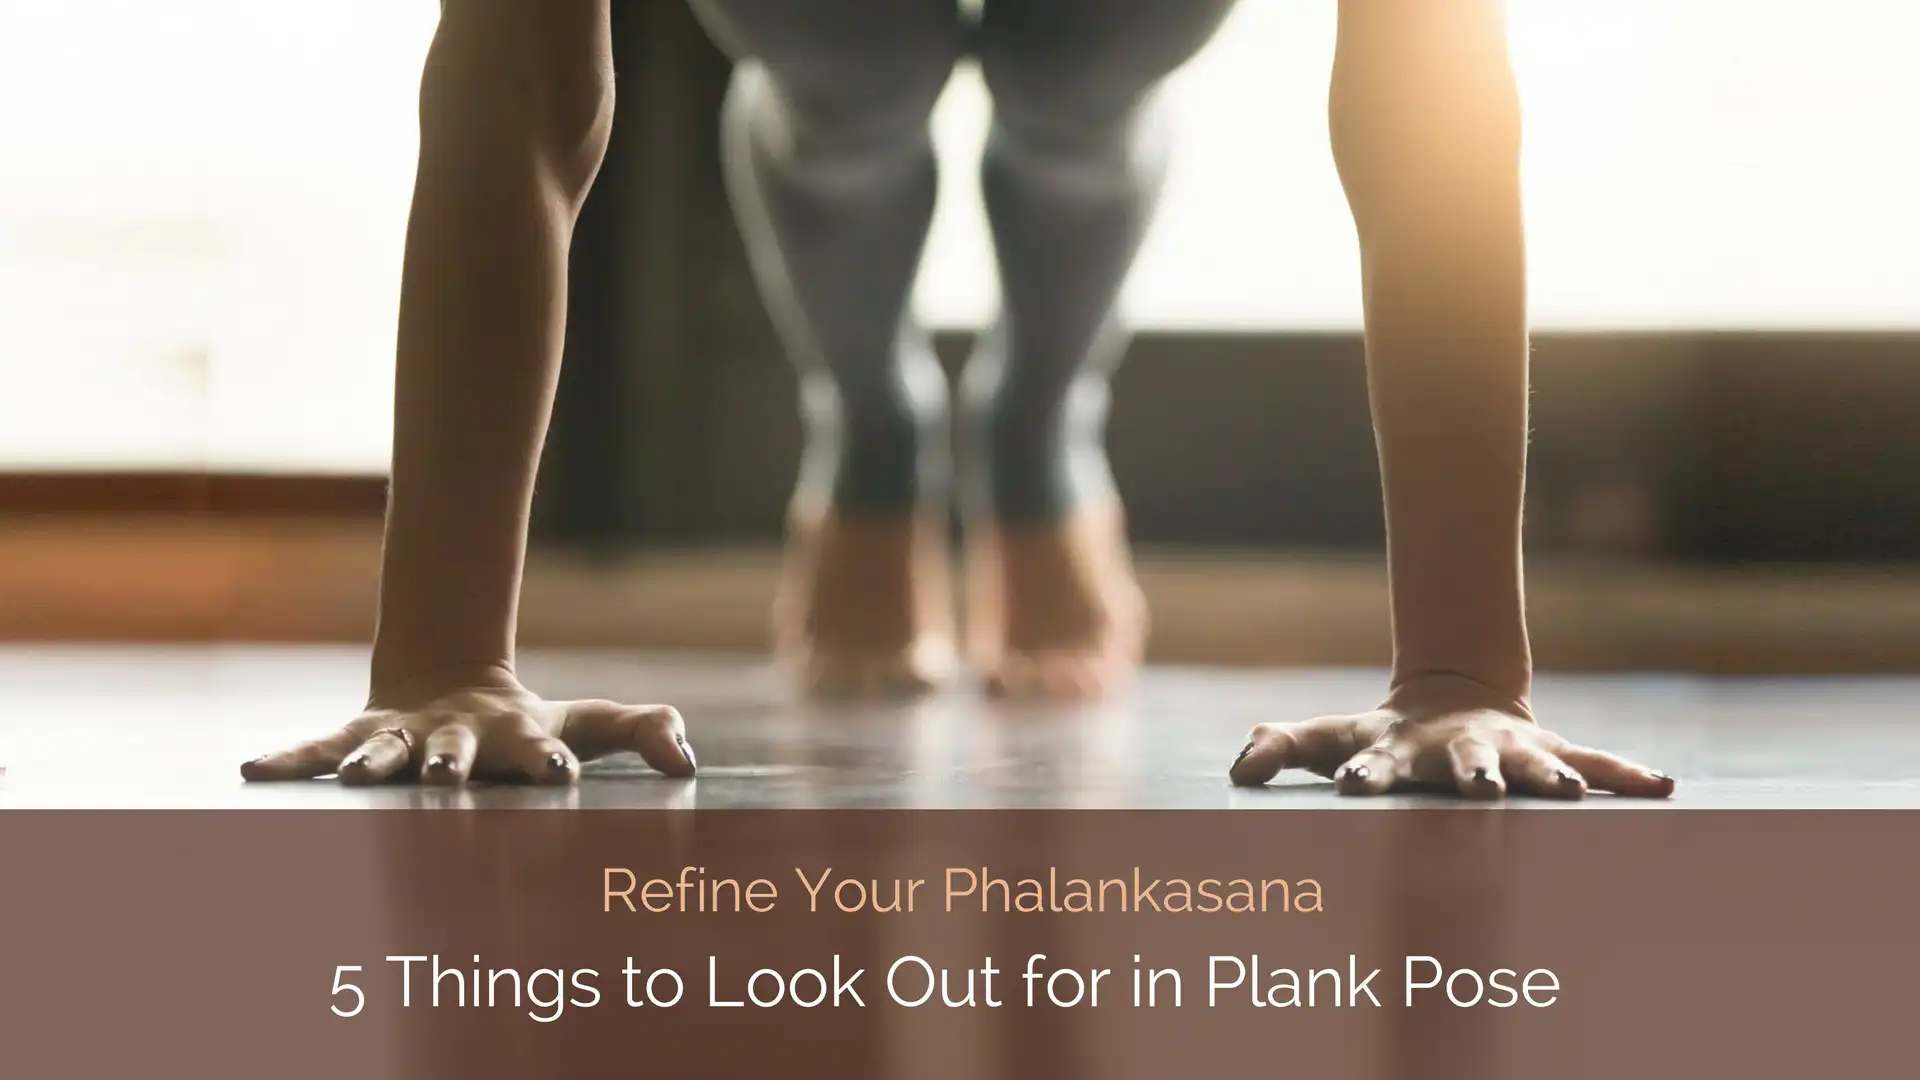
Plank Pose is traditionally taught with hands under shoulders and wrist creases parallel to the front of the mat; however, finding your personal hand placement in plank is imperative for supporting your shoulders.
Not everyone’s skeletal shape is the same, and almost all of us have what is called a carrying angle in our elbows that must be taken into consideration. Essentially a carrying angle prevents the arms from going perfectly straight. Standing with the arms extended down by the sides of the body and the palms facing forward, the majority of us will observe that our forearms angle out away from the body (5 to 15 degrees on average) so that the hands are actually wider than the shoulders. When the hands are placed directly under the shoulders in Plank Pose then, the elbows angle in toward one another.
Don’t believe me? Try it. Standing, raise your arms straight out in front of your body to the height of your shoulders. Turn your palms up, and as best you can align your wrists with your shoulders. Are your arms completely straight, or do your elbows angle in any amount? Remember it’s slight, generally only 5 to 15 degrees, and chances are one elbow has more of a carrying angle than the other.
For optimal shoulder stability, you want to place your hands so that your elbows are beneath your shoulders in a vertical stack. You also want your biceps facing fairly forward, and for your hands to easily anchor through all sides. To find that, you’re most likely going to need to widen your hands further apart and slightly turn your hands so that the wrist creases angle out.
-
Start on your hands and knees in Tabletop Pose (hands and knees) with your hands directly under your shoulder.
-
Play with taking your hands wider until your elbows are in line with your shoulders, as well as turning the hands out little by little to find your personal hand placement in Plank Pose.
-
Pay attention to any counterproductive sensations, there should be no pain in your wrists, elbows, or shoulders when you bear weight in Phalankasana.
Anchor the Index Knuckle
In Plank Pose, pay attention to the distribution of weight through the palms of your hands. A really common tendency is for the root of the index finger to lift up, forcing all of the weight into the outer heels of the hands often causing pain in the outer wrists.
-
In Tabletop Pose, with your elbows stacked under your shoulders and wrist creases angled slightly out, spread your fingers and press down evenly through all sides of your palms, anchoring the index knuckle. You want to feel your arms engage so that you feel yourself lifting a bit up and out of your wrists.
-
Relax your hands, allowing the root of your index finger to unplug from the floor, and notice where you feel it in your palms and wrists.
-
Once in Plank Pose concentrate on keeping all finger pads anchored into the floor.
-
If you’re still experiencing wrist pain—which is actually pretty common—the degree of wrist flexion in Phalankasana may not be appropriate for your range of motion. In this case, using a yoga wedge under your wrists and hands to lessen the angle is a skillful choice.
Foot Placement is Also Personal
The width of your foot stance is also quite personal for Plank Pose (as it is for Tadasana (Mountain Pose) and Adho Mukha Svanasana (Downward-Facing Dog Pose). Experiment with placing both the feet together and apart to find your personal feet-width-distance-apart to feel the most stable in Phalankasana.
-
Start with your feet as wide as your hips and notice how that feels, particularly in your low back.
-
Try stepping them together and observe how that feels.
-
Next try stepping your feet wider than your hips, paying attention again to the different sensations in your body.
-
Where does it feel like your ankles are aligned with your hips?
-
Find the foot placement that feels the most stable and supportive, and doesn’t create pain (an unproductive sensation) in your low back, knees or groins.
Use Your Legs
As mentioned previously, the common tendency in Plank Pose is to rely solely on the strength of your arms, shoulders, and chest to hold you up. But you’ve got to employ your legs as well. Rather than leaving the legs relaxed and letting your thighbones hang heavily toward the floor, press your thighs up, engaging all four sides of your legs (inner and outer thighs, quadriceps, and hamstrings).
The height of your thighs and buttocks depends on the unique curvature of your spine. In Plank Pose, allow your thighs to drop down and then play with pressing them skyward. You know you’ve found the right amount of lift and engagement of the legs when the backline of your body is active, there is no pain in your low back or SI joints; and your pelvis, low back, and midsection feel stable.
Neck in Line with the Rest of the Spine
Another very common tendency is to drop your head—especially if Plank Pose is repeatedly used as a transition pose on the way down to Chaturanga Dandasana (Four-Limbed Staff Pose). How high you lift your head, and where you place your gaze, is going to be unique to the curvature of your neck. As a general rule, you want to lift through the back of your skull, activating the musculature along the back of your neck, and lengthen evenly through all four sides of your neck, bringing your neck in line with the rest of your spine.
Once in Plank Pose, play with bringing your head and neck in line with the rest of your body and notice where this may feel like work, and perhaps, unwise. If you feel pain in your neck, shoulders, the base of your skull, or even your jaw, investigate the head and neck position that is appropriate for your spine.
Would you like another Yoga Pose Primer from YogaUOnline and writer, Meagan McCrary? Here’s one – Yoga Pose Primer: Upward-Facing Dog.
Learn more about yoga and shoulder anatomy with YogaUOnline and Julie Gudmestad – Yoga Anatomy: Keeping the Rotator Cuff Healthy in Yoga.

 Meagan McCrary is an experienced yoga teacher (500 E-RYT) and writer with a passion for helping people find more comfort, clarity, compassion, and joy on the mat and in their lives. She is the author of Pick Your Yoga Practice: Exploring and Understanding Different Styles of Yoga Practice, a comprehensive encyclopedia of prominent yoga styles, including each system’s teaching methodology, elements of practice, philosophical and spiritual underpinnings, class structure, physical exertion and personal attention. Currently living in Los Angeles, Meagan teaches at the various Equinox Sports Clubs, works privately with clients and leads retreats internationally. You can find her blog, teaching schedule, and latest offerings at www.MeaganMcCrary.com, as well as on Facebook.
